Precipitate DNA
This step uses isopropanol (2-propanol), 100% and PM1 to precipitate the DNA.
 Preparation
|
1.
|
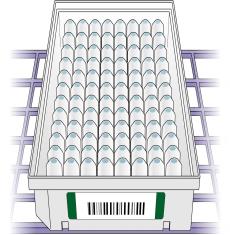
If the WGA plate was stored at -25°C to -15°C, thaw to room temperature, vortex at 1600 rpm for 1 minute, and then centrifuge at 280 × g for 1 minute. |
|
2.
|
Remove and discard the cap mat. |
|
3.
|
Prepare the following consumable: |
|
PM1
|
2°C to 8°C
|
Bring to room temperature. Vortex or invert 10 times to mix. Centrifuge reagent tubes at 280 × g for 1 minute, or flick bottle to remove reagent from lid.
|
|
4.
|
Prepare the required amount of PM1 and isopropanol reagent according to instructions on the interface. |
|
0.5
|
48
|
1 tube/7 ml
|
27 ml
|
|
1
|
96
|
2 tubes/14 ml
|
46 ml
|
|
2
|
192
|
4 tubes/28 ml
|
84 ml
|
|
3
|
288
|
45 ml
|
130 ml
|
|
4
|
384
|
1 bottle/60 ml
|
150 ml
|
|
5.
|
Set the refrigerated centrifuge to 4°C. |
Procedure
|
1.
|
Open ILASS on the IAPS controller PC and sign in. |
|
2.
|
Select the Infinium Genotyping Assay with PGx workflow. |
|
3.
|
Select the Precipitate DNA step. |
|
4.
|
Select the Product Type drop-down, and then select Infinium Genotyping with PGx Array LCG-8. |
|
5.
|
In Container Input Quantity, enter the number of 96-well plates to be processed. Manually enter the value or set the value using +/-. |
ILASS displays the number of required materials based on number of plates.
The downstream Extend and Stain BeadChips step can handle a maximum of 24 BeadChips (192 samples) per run on each IAPS with ILASS. Plan your experiment with care. If needed, use downstream safe stopping points and multiple Hybridize DNA to the BeadChip and Extend and Stain BeadChips steps.
|
7.
|
Set up the IAPS with ILASS worktable as shown on the interface, according to the number of plates used in the run. |
|
8.
|
Before loading the worktable, mix PM1 using one of the following methods: |
|
•
|
If you are using reagent tubes, invert each tube 10 times, and then centrifuge at 280 × g for 1 minute. |
|
•
|
If you are using a reagent bottle (60 ml), flick the bottle to remove the reagent from the lid. |
|
9.
|
Pour PM1 reagent into the PM1 half-trough. |
|
10.
|
Pour the required amount of isopropanol into the isopropanol full-trough. |
|
11.
|
Select Auto-Scan Item(s). |
|
12.
|
Select Manual-Scan Item(s). |
|
13.
|
Manually enter information for trough reagents by following the user interface. |
|
14.
|
After successful scanning, the user interface displays a timer. |
|
16.
|
Wait for the IAPS with ILASS to finish the run. |
|
17.
|
Apply a foil adhesive seal to the WGA plates. |
|
18.
|
Invert the plates 10 times to mix. |
|
19.
|
Incubate the plates in a refrigerator set at 4°C for 30 minutes. |
|
20.
|
Remove the troughs from the worktable, discard residual reagent volume, and clean troughs with DI water. |
|
21.
|
Centrifuge the WGA plates at 3000 × g at 4°C for 20 minutes. |
|
•
|
When centrifuging is complete, proceed immediately to the next step to avoid dislodging the blue pellet. |
|
•
|
If a delay occurs, repeat the 20-minute centrifugation step. |
|
22.
|
Remove the WGA plates from the centrifuge. |
|
23.
|
Make sure that a blue pellet is present in the bottom of each sample well. |
|
24.
|
Remove and discard the foil adhesive seal. |
|
25.
|
Hold the plate over an absorbent pad and do as follows. |
|
a.
|
Quickly invert to decant the supernatant. |
|
b.
|
Drain liquid onto the absorbent pad, and then firmly tap the plate down on a dry area of the pad. |
|
c.
|
Keeping the plate inverted, firmly tap until all wells are free of liquid (~1 minute). Do not allow supernatant to pour into other wells. |
|
d.
|
Place the uncovered, inverted plate on the tube rack for 1 hour at room temperature to air-dry the pellets. |
|
e.
|
Make sure that a blue pellet is still present in the bottom of each sample well. |
|
f.
|
Keeping the plate inverted, use a Kimwipe to remove any residual alcohol on the surface of the plate or draining from the wells of the plate. |
Inverted WGA Plate
Avoid overdrying the pellets. Pellets that are overdried are difficult to resuspend and can lead to poor data quality.
SAFE STOPPING POINT
If you are stopping, seal the plate with a cap mat, and store at -25°C to -15°C for up to 24 hours.

