Thaw Standard SBS Consumables
This step thaws the cartridge in the unopened bag using one of three methods: controlled water bath, refrigerator, or room temperature air. Use the cartridge immediately after thawing, without refreezing. If you are unable to use the cartridge immediately after thawing, refer to Return Consumables to Storage.
It is not recommended to run a cartridge with a torn or punctured bag as it may result in a sequencing failure.
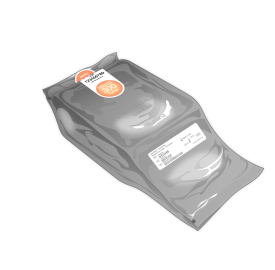
Bagged Cartridge
 Thaw in a Controlled Water Bath
|
1.
|
Put on a new pair of powder-free gloves and remove the cartridge from storage. |
|
2.
|
Remove cartridge from the box but do not open the silver foil bag. |
|
3.
|
Thaw the bagged cartridge in a controlled 25°C water bath as follows: |
|
•
|
[P1, P2, or P3 standard SBS Reagent kits (100-cycle, 200-cycle, or 300-cycle)] Thaw for 6 hours. Do not exceed 8 hours. |
|
•
|
[P1 or P2 standard SBS Reagent kits (600-cycle)] Thaw for 8 hours. Do not exceed 10 hours. |
|
•
|
Maintain a water depth of at least 9.5–10 cm regardless of how many cartridges you are thawing. |
|
•
|
Face the bag label up and set in water bath without submerging. |
Do not attempt to weigh the cartridge down to submerge. If the bag label is not facing up or the cartridge inverts during thawing, sequencing data is negatively impacted.
|
•
|
Do not simultaneously thaw more cartridges than supported by the water bath, refer to Ancillary Equipment. |
|
•
|
Do not stack cartridges. |
|
4.
|
Remove cartridge from water bath and dry with paper towels. |
Thaw in a Refrigerator
|
1.
|
One day before the anticipated run, remove the cartridge from -25°C to -15°C storage. |
|
2.
|
Put on a new pair of powder-free gloves. |
|
3.
|
Remove cartridge from the box but do not open the silver foil bag. |
|
4.
|
Position the cartridge at room temperature so that the label faces up and air can circulate on sides and top. |
If the bag label is not facing up, sequencing data is negatively impacted.
|
5.
|
Thaw at room temperature for 6 hours. |
|
6.
|
Position the cartridge in a 2°C to 8°C refrigerator so that the label faces up and air can circulate on sides. |
If the bag label is not facing up, sequencing data is negatively impacted.
|
7.
|
Thaw in the refrigerator as follows: |
|
•
|
[P1, P2, or P3 standard SBS Reagent kits (100-cycle, 200-cycle, or 300-cycle)] Thaw for 12 hours. Do not exceed 72 hours. |
|
•
|
[P1 or P2 standard SBS Reagent kits (600-cycle)] Thaw for 16 hours. Do not exceed 72 hours. |
|
8.
|
Set the unopened cartridge aside at room temperature for at least 15 minutes before sequencing. Do not exceed 1 hour. |
Thaw at Room Temperature
|
1.
|
Put on a new pair of powder-free gloves. |
|
2.
|
Remove the cartridge from -25°C to -15°C storage. |
|
3.
|
Remove cartridge from the box but do not open the silver foil bag. |
|
4.
|
Position the cartridge so that the label faces up and air can circulate on sides and top. |
If the bag label is not facing up, sequencing data is negatively impacted.
|
5.
|
Thaw at room temperature as follows: |
|
•
|
[P1, P2, or P3 standard SBS Reagent kits (100-cycle, 200-cycle, or 300-cycle)] Thaw for 9 hours. Do not exceed 16 hours. |
|
•
|
[P1 or P2 standard SBS Reagent kits (600-cycle)] Thaw for 12 hours. Do not exceed 16 hours. |
Prepare the Flow Cell
|
1.
|
Remove a new flow cell from 2°C to 8°C storage. |
|
2.
|
Set the unopened package aside at room temperature for 10–15 minutes to prevent condensation when removing the flow cell from the package. Preparing the flow cell now makes sure that it reaches room temperature on time. |
|
3.
|
If using the refrigerator thaw method, remove thawed cartridge from 2°C to 8°C storage. |

