
Set Up a Sequencing Run (Local Run Manager)
Setting up a run using Local Run Manager includes creating and saving the run in Local Run Manager, then returning to the control software to load consumables and select the run. Data are saved to the specified output folder for analysis, which Local Run Manager performs automatically when the run is complete.
| 1. | Open Local Run Manager locally on the instrument monitor or remotely from another computer: |
|
Access |
Open Local Run Manager |
|---|---|
|
Local |
From the control software menu, select Local Run Manager, and then select Open Local Run Manager. |
|
Remote |
From the control software menu, select About to obtain the system IP address. From a computer on the same network as the instrument, open Local Run Manager in Chromium. Use the system IP address to connect. |
| 2. | If Chromium appears blank on the instrument monitor, power cycle the instrument and restart run setup. Refer to Power Cycle the Instrument for instructions. |
| 3. | In Local Run Manager, create and save the run. |
| • | Refer to the Local Run Manager v4 Software Guide (200036672) for instructions. |
| • | Set up a PhiX-only run to be non-indexed. |
Local Run Manager automatically sends saved runs to the control software.
| 4. | In the control software, select Sequence. |
The software opens the door at an angle, ejects the tray, and initiates the series of run setup screens.
| 5. | [Optional] Select Help to view an onscreen prompt. |
Help prompts appear on each screen to provide supplementary guidance.
| 2. | Place the cartridge onto the tray |
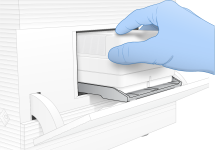
| 3. | Select Close Door |
A panel appears on the left side of the screen to show information from the scanned consumables.
The BaseSpace Sequence Hub screen appears when the system is configured for Run Monitoring or Run Monitoring and Storage.
| 1. | To disconnect |
Instrument performance data are still sent to Illumina.
| 2. | To change connectivity |
| • | Run Monitoring Only—Send only InterOp files to BaseSpace Sequence Hub to allow remote monitoring. |
| • | Run Monitoring and Storage—Send run data to BaseSpace Sequence Hub to allow remote monitoring and analysis. |
| 3. | Enter your |
| 4. | If the Available Workgroups list appears, select a workgroup |
The list appears when you belong to multiple workgroups.
| 5. | Select Run Setup. |
| 1. | If the Local Run Manager login screen appears: |
| a. | Enter your user name and password. |
| b. | Select Log In. |
The screen appears when Local Run Manager is configured to require signing in. By default, signing in is not required.
| 2. | Select a run from the Run Name list |
| • | To view an updated list, select Refresh. |
| • | To populate an empty list, select Open Local Run Manager and create a run. |
Selecting Open Local Run Manager minimizes the control software and opens Local Run Manager in Chromium.
| 3. | If you left the control software |
| 4. | [Optional] Select Edit, and then modify run parameters |
| a. | To change Read Type, select |
| b. | To change Read Cycle, enter 26–151 cycles for Read 1. Add one cycle to the desired number of cycles. |
| c. | To change the output folder for the current run, enter |
| d. | Select Save, which updates the run in both the control software and Local Run Manager. |
| 5. | Select Start Run |
Pre-run checks include an instrument check and a flow check. The flow check pierces the cartridge seals and passes reagent through the flow cell, so consumables cannot be reused after it starts.
| 1. | Wait |
The run starts automatically after successful completion. Unless the system is muted, a chime sound indicates that the run has started.
Opening the door during the pre-run check or the run can cause run failure.
| 2. | If an error occurs |
The instrument check precedes the flow check. When a check is in progress, the bar is animated.
| 3. | If an error recurs, refer to Error Message Resolution to troubleshoot. |
| 1. | Monitor run progress and metrics |
|
Metric |
Description |
|---|---|
|
%Q30 Read 1 |
The percentage of Read 1 base calls with a Q-score ≥ 30. |
|
%Q30 Read 2 |
The percentage of Read 2 base calls with a Q-score ≥ 30. |
|
%Clusters PF |
The percentage of clusters that passed quality filters. |
|
%Occupancy |
The percentage of flow cell wells containing clusters. |
|
Projected Total Yield |
The expected number of bases called for the run. |
| 2. | To monitor |
| 1. | When sequencing is complete, select Eject Cartridge. |
The software ejects the used cartridge from the instrument.
| 2. | Remove the cartridge from the tray. |
| 3. | Remove the flow cell from the cartridge. |
| 4. | Dispose of the flow cell, which has electronic components, in accordance with applicable standards for your region. |
| 5. | Dispose of the cartridge, which contains used reagents, in accordance with applicable standards for your region. |
A post-run wash is not necessary because fluidics are discarded with the cartridge.
This set of reagents contains potentially hazardous chemicals. Personal injury can occur through inhalation, ingestion, skin contact, and eye contact. Ventilation should be appropriate for handling of hazardous materials in reagents. Wear protective equipment, including eye protection, gloves, and laboratory coat appropriate for risk of exposure. Handle used reagents as chemical waste and discard in accordance with applicable regional, national, and local laws and regulations. For additional environmental, health, and safety information, refer to the SDS at support.illumina.com/sds.html.
| 6. | Select Close Door |
The software automatically reloads the tray and sensors confirm cartridge removal.
